
Connect a web agent with OAuth
WildEdge supports OAuth authentication for remote Model Context Protocol (MCP) clients. This lets web agents such as ChatGPT and Claude connect to your WildEdge account through a browser sign-in—there is no access token to create, copy, or paste into the agent.
Use this MCP server URL in your agent:
https://app.wildedge.dev/mcpDuring setup, the agent redirects you to WildEdge. You sign in, choose Read or Read + Write, and authorize the connection. WildEdge then issues and manages the OAuth credentials for that agent.
Connecting a coding agent?
For Codex CLI, Claude Code, or Gemini CLI, see the personal access token setup guide.
Connect ChatGPT
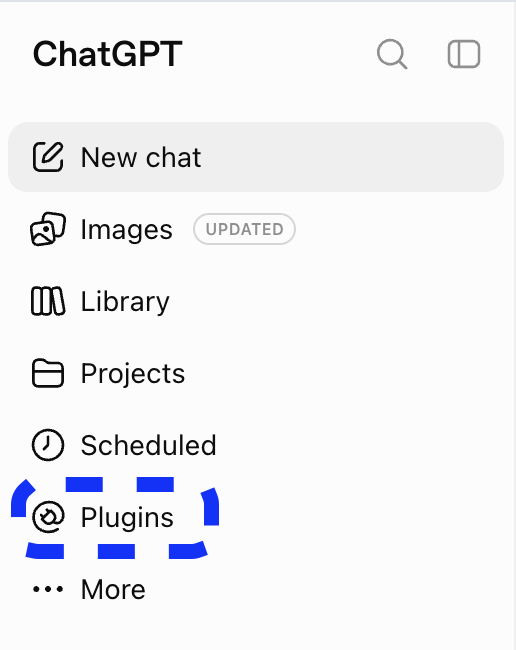
1. Open Plugins
In ChatGPT, select Plugins in the left sidebar.
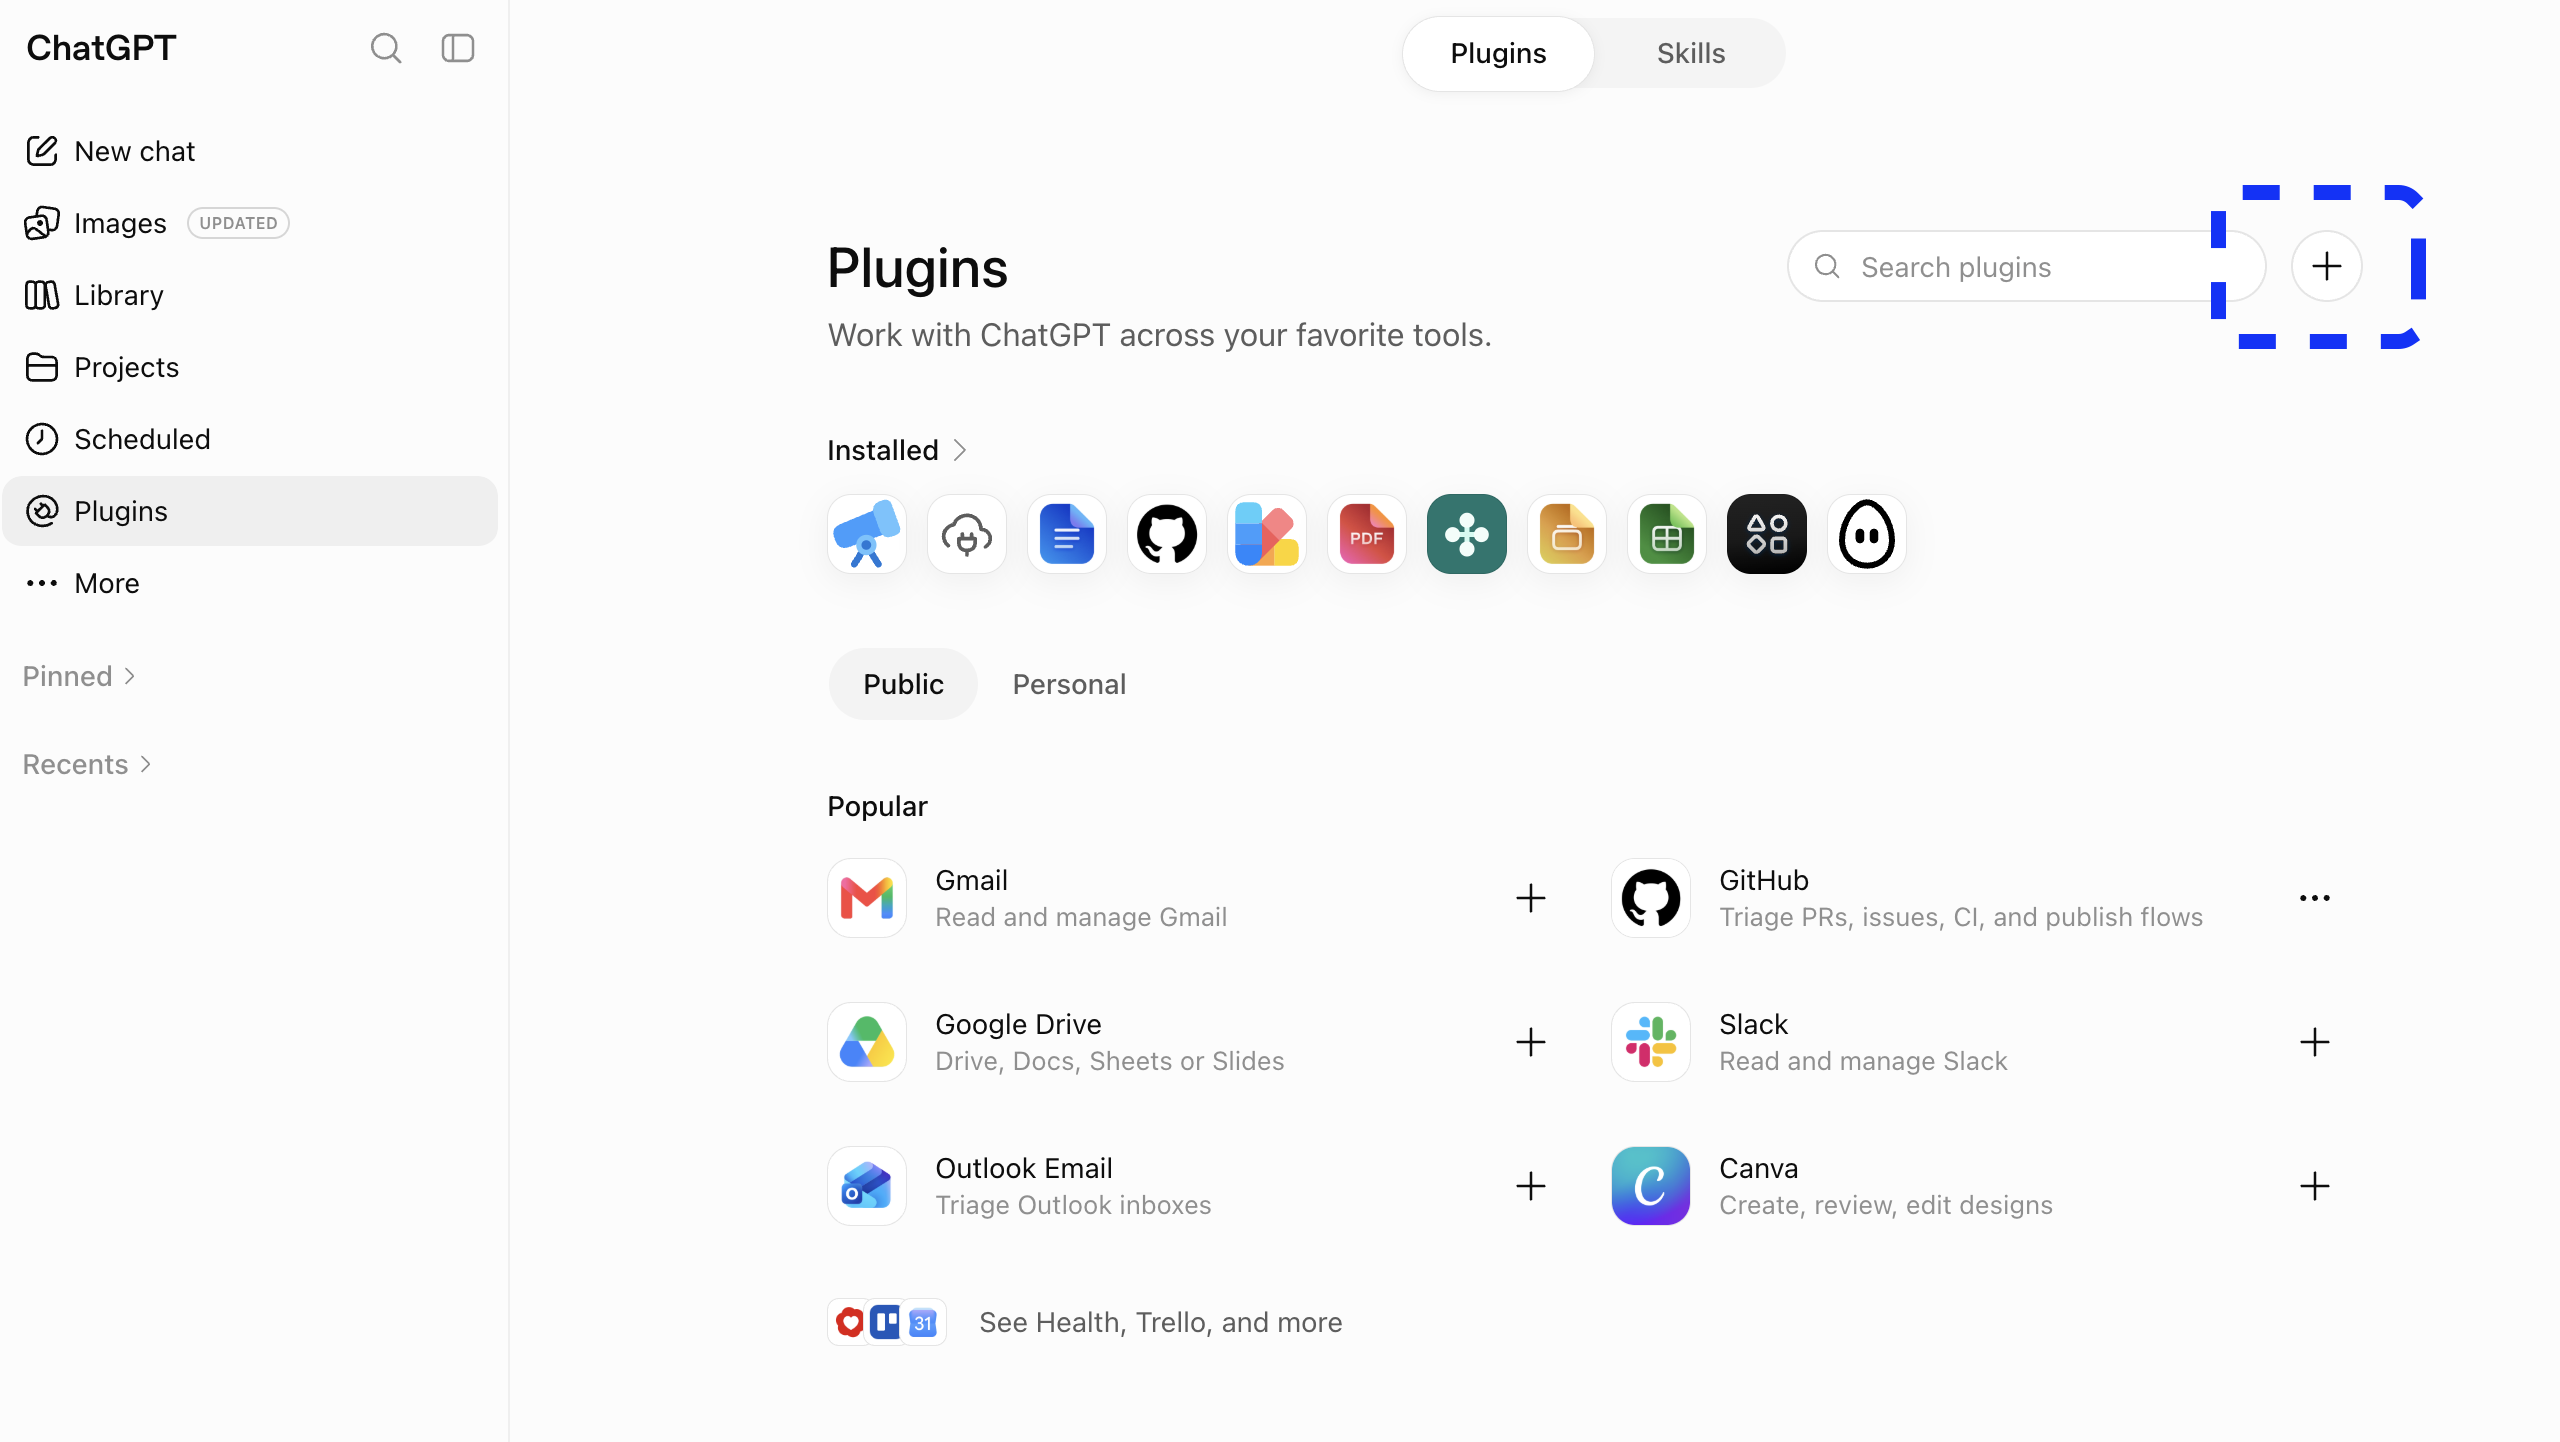
On the Plugins page, select the + button.
2. Add the WildEdge MCP server
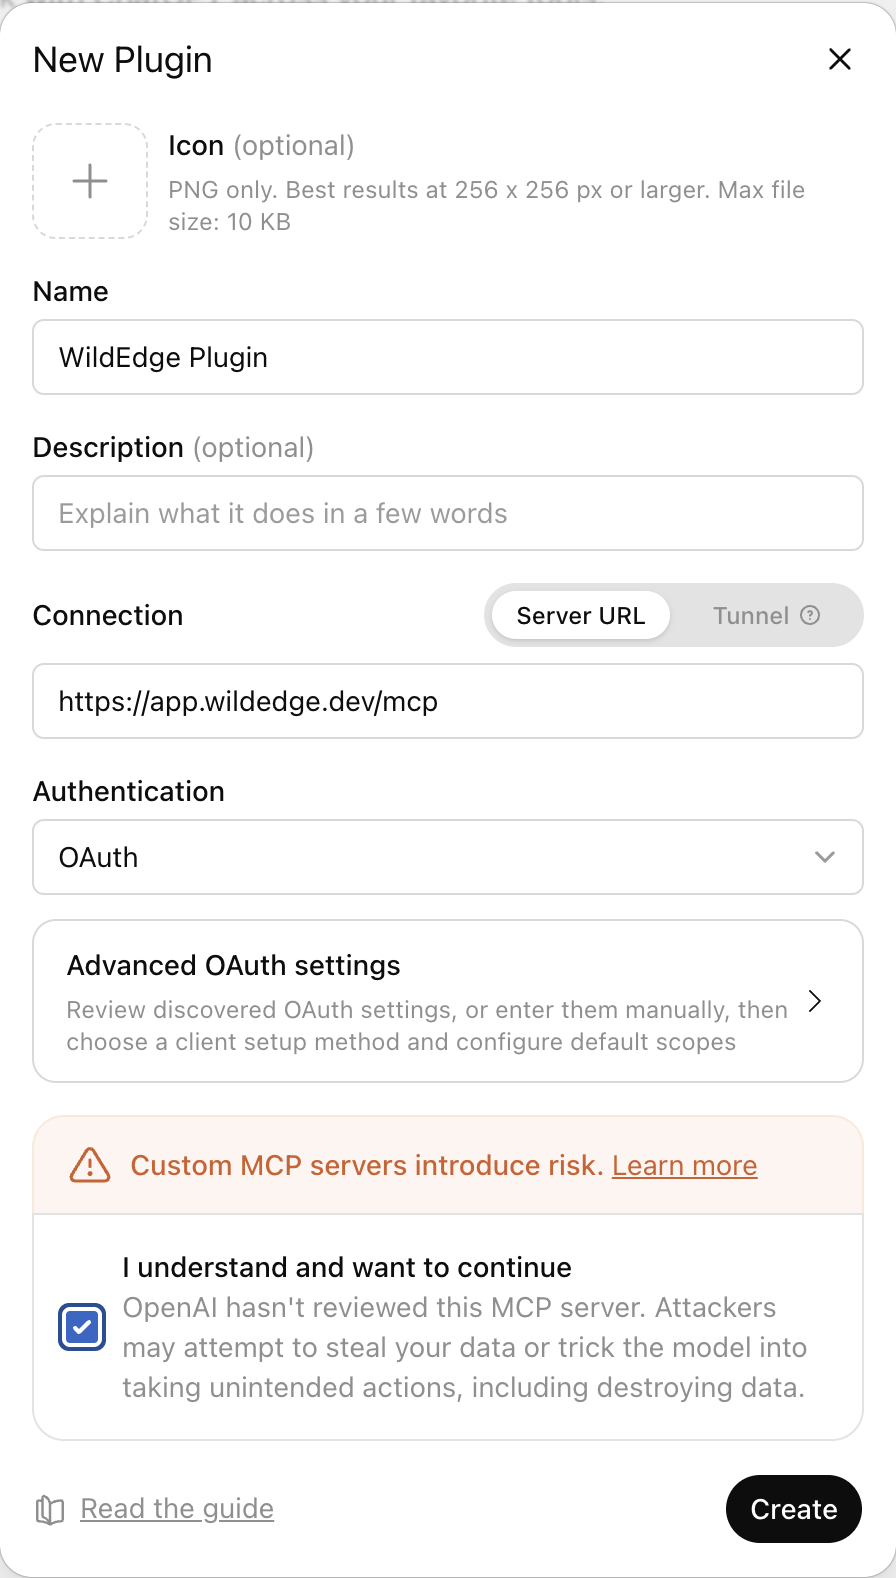
Fill in the New Plugin form:
- Name:
WildEdge(or another name you will recognize) - Connection: Server URL
- Server URL:
https://app.wildedge.dev/mcp - Authentication: OAuth
You can leave the icon, description, and advanced OAuth settings unchanged. Review ChatGPT's custom MCP server warning, acknowledge it if you trust this WildEdge endpoint, and select Create.
Use the exact server URL
Enter https://app.wildedge.dev/mcp. Do not enter the documentation URL or the WildEdge dashboard URL.
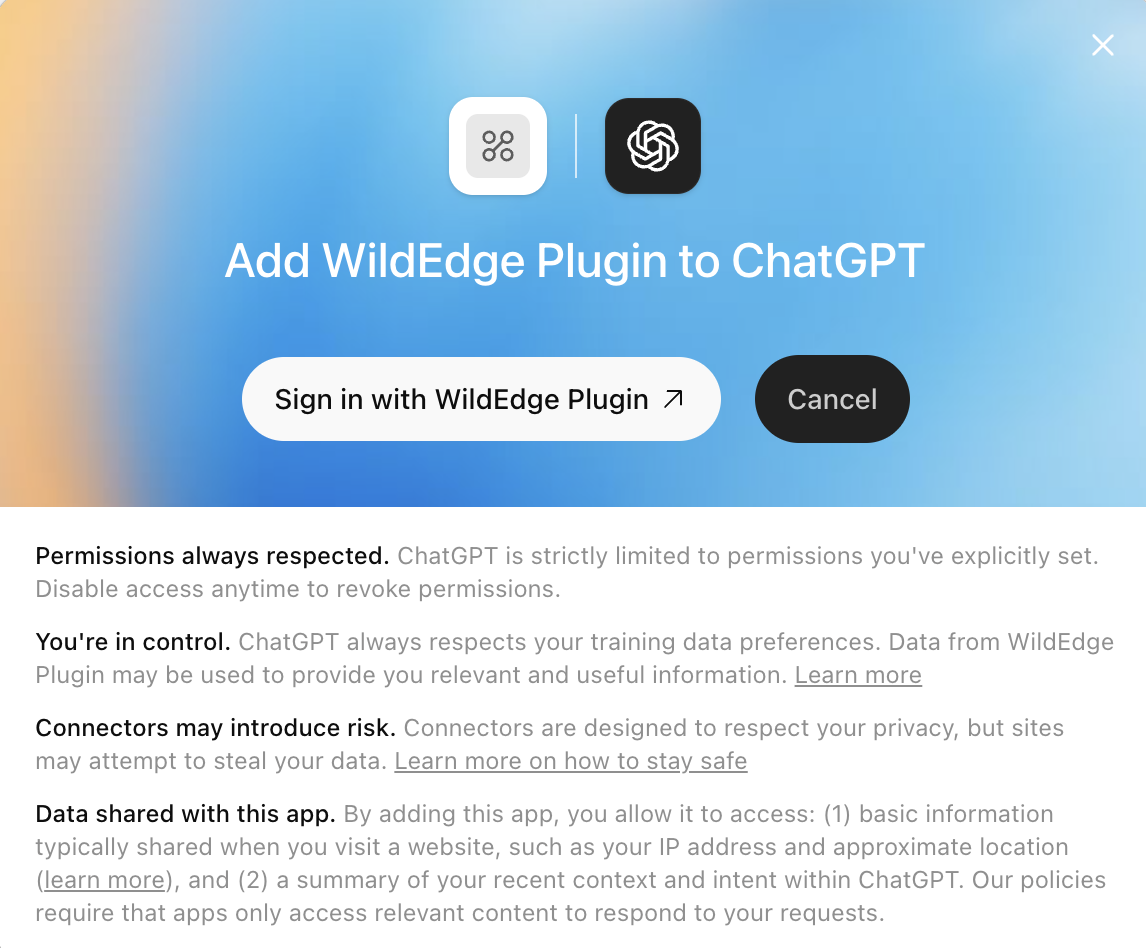
3. Continue to WildEdge
ChatGPT opens a connection screen. Select Sign in with WildEdge to continue in your browser.
Then complete the shared WildEdge authorization flow.
Connect Claude
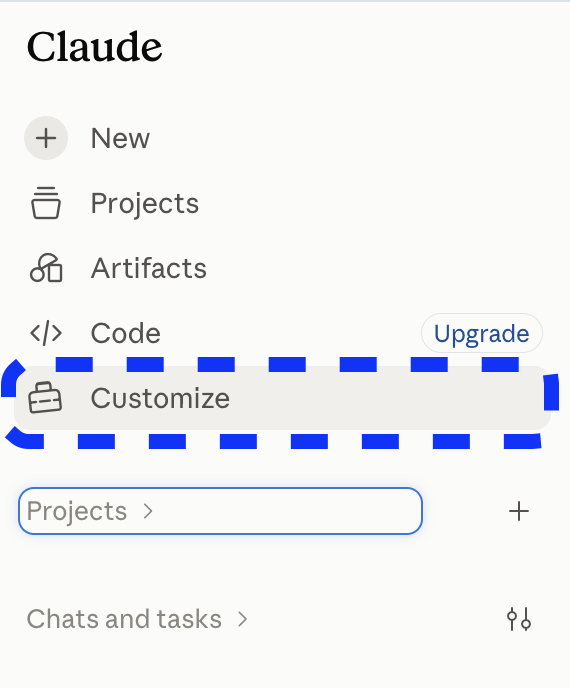
1. Open Customize
In Claude, select Customize in the left sidebar.
2. Add a custom connector
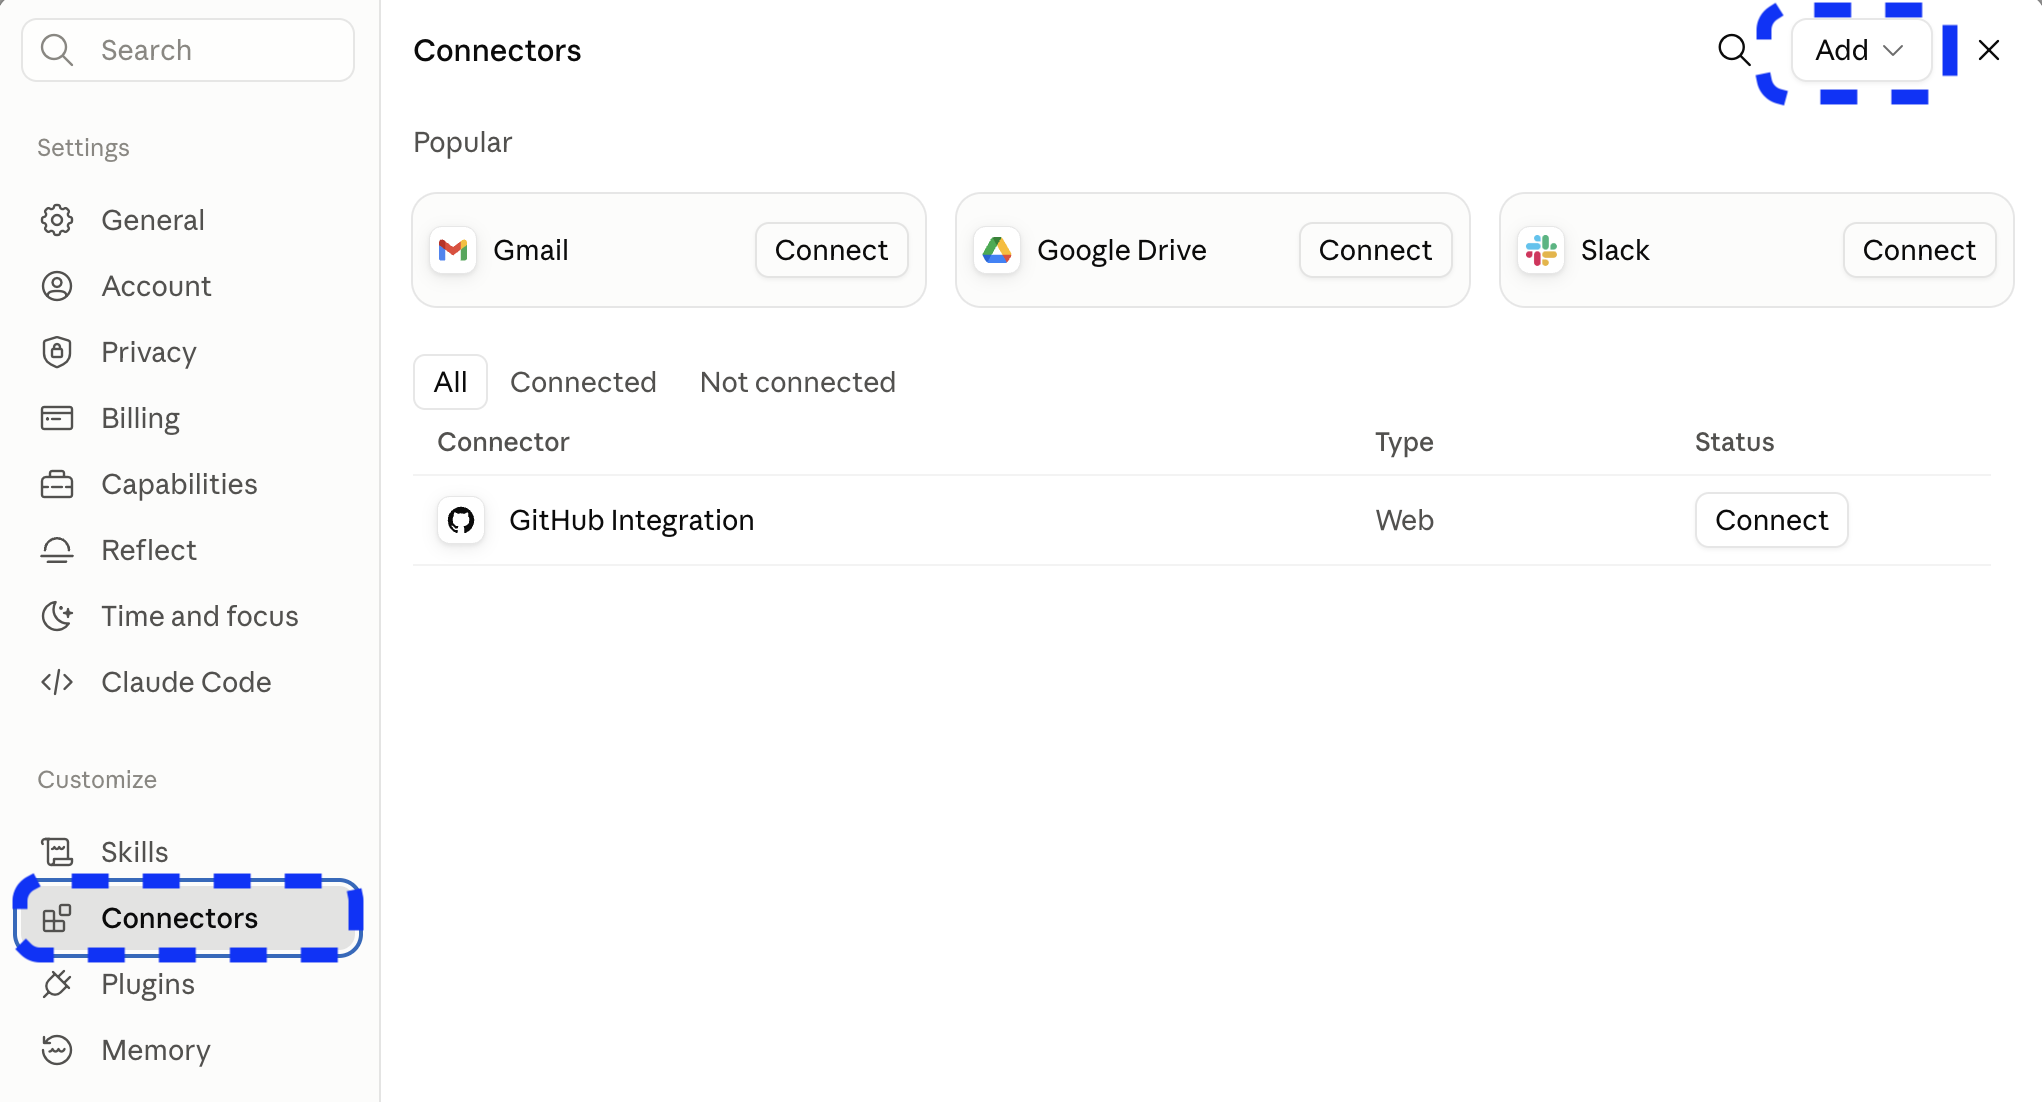
Open Connectors, then select Add.
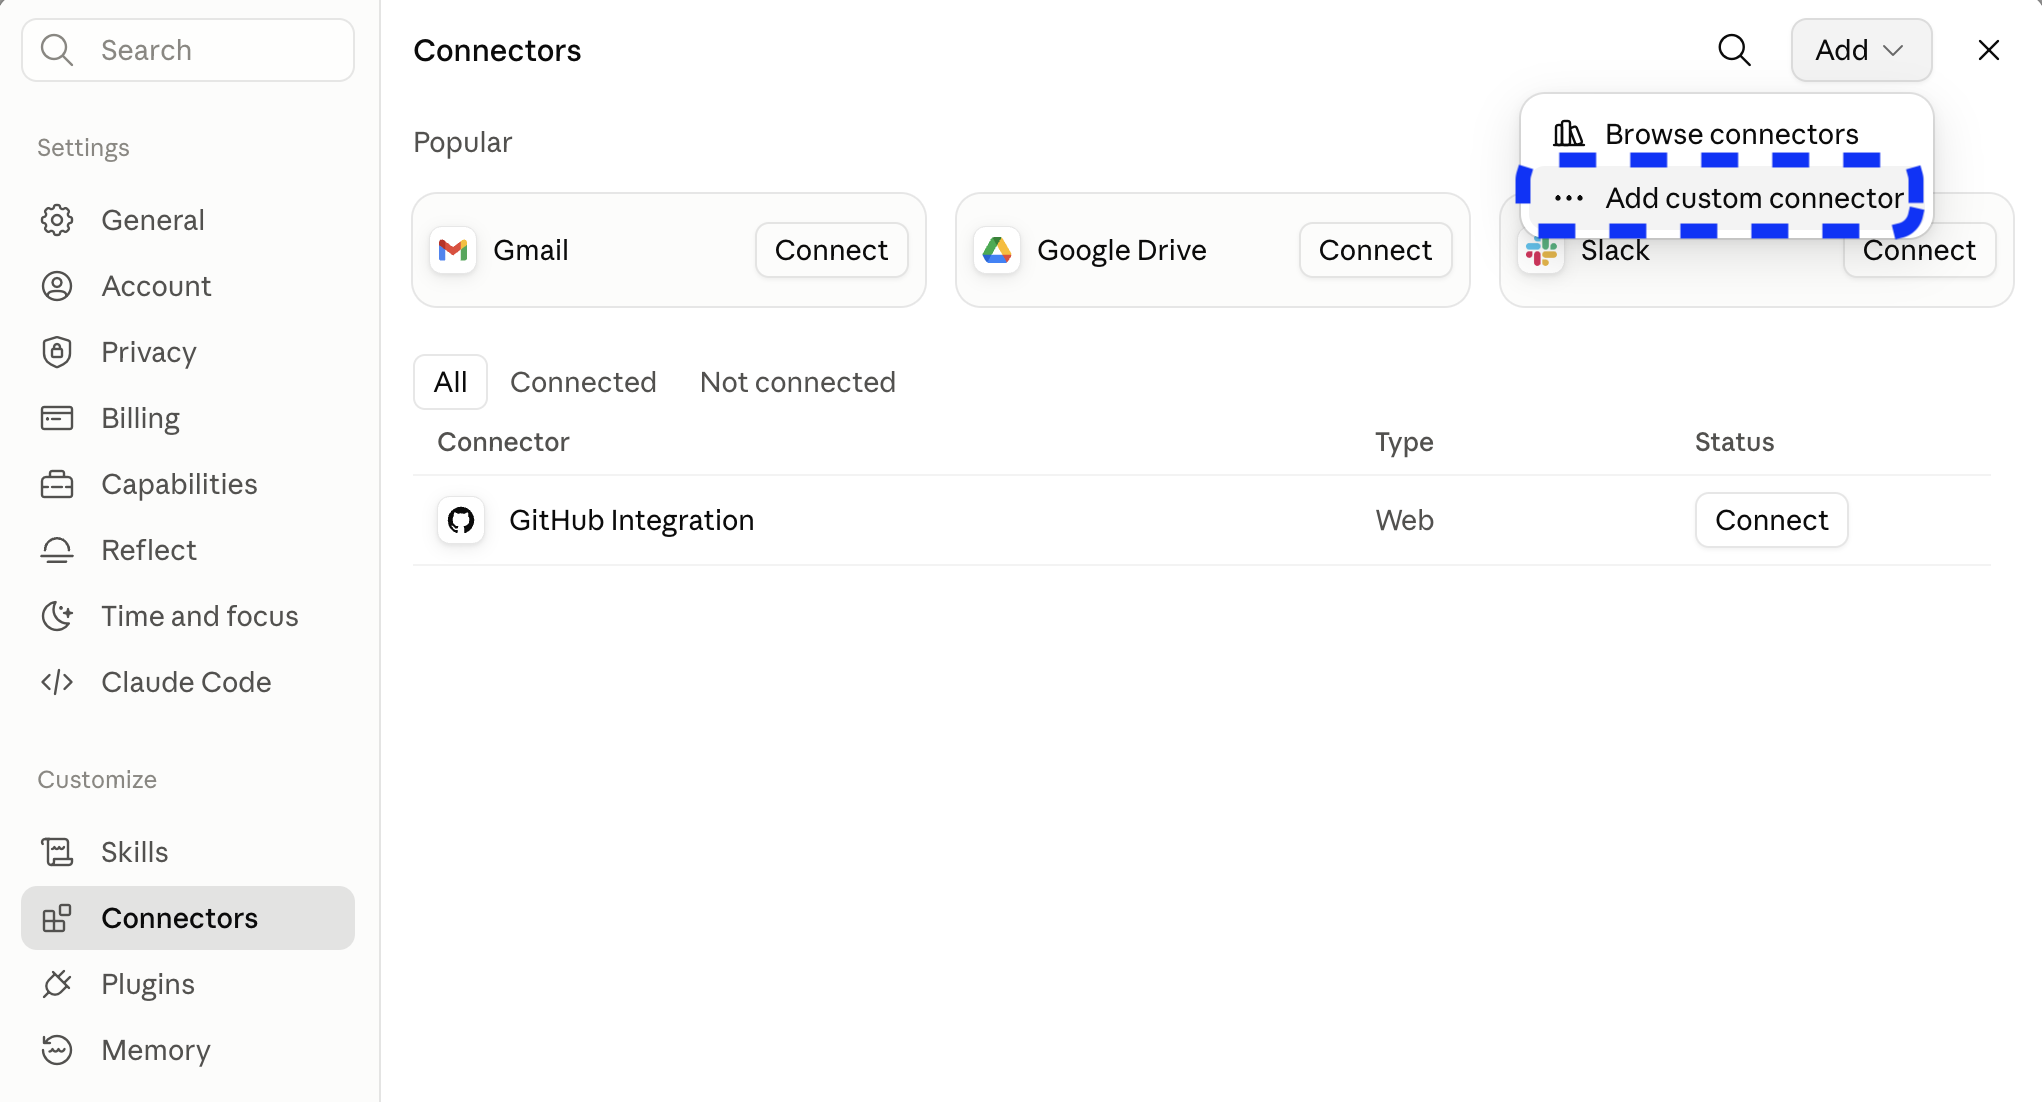
From the menu, select Add custom connector.
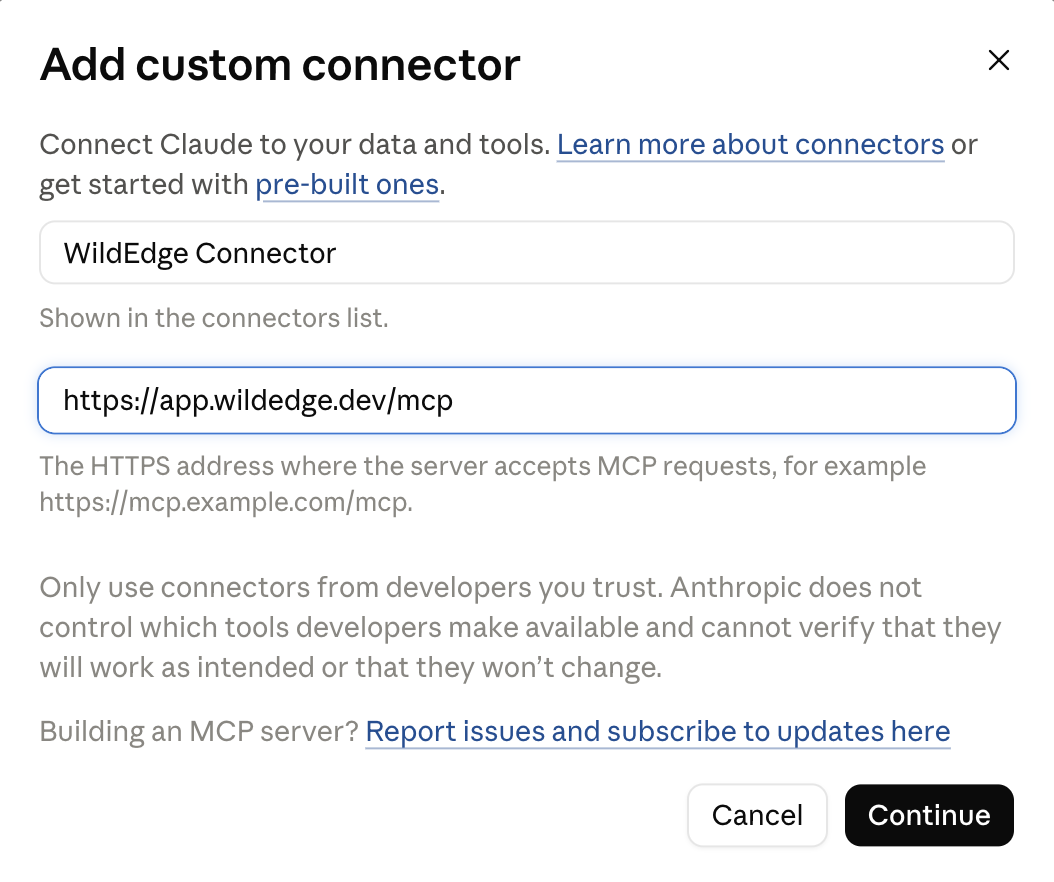
3. Enter the WildEdge server URL
Name the connector WildEdge, enter https://app.wildedge.dev/mcp as the connector URL, and select Continue.
Use the exact server URL
Enter https://app.wildedge.dev/mcp. Do not enter the documentation URL or the WildEdge dashboard URL.
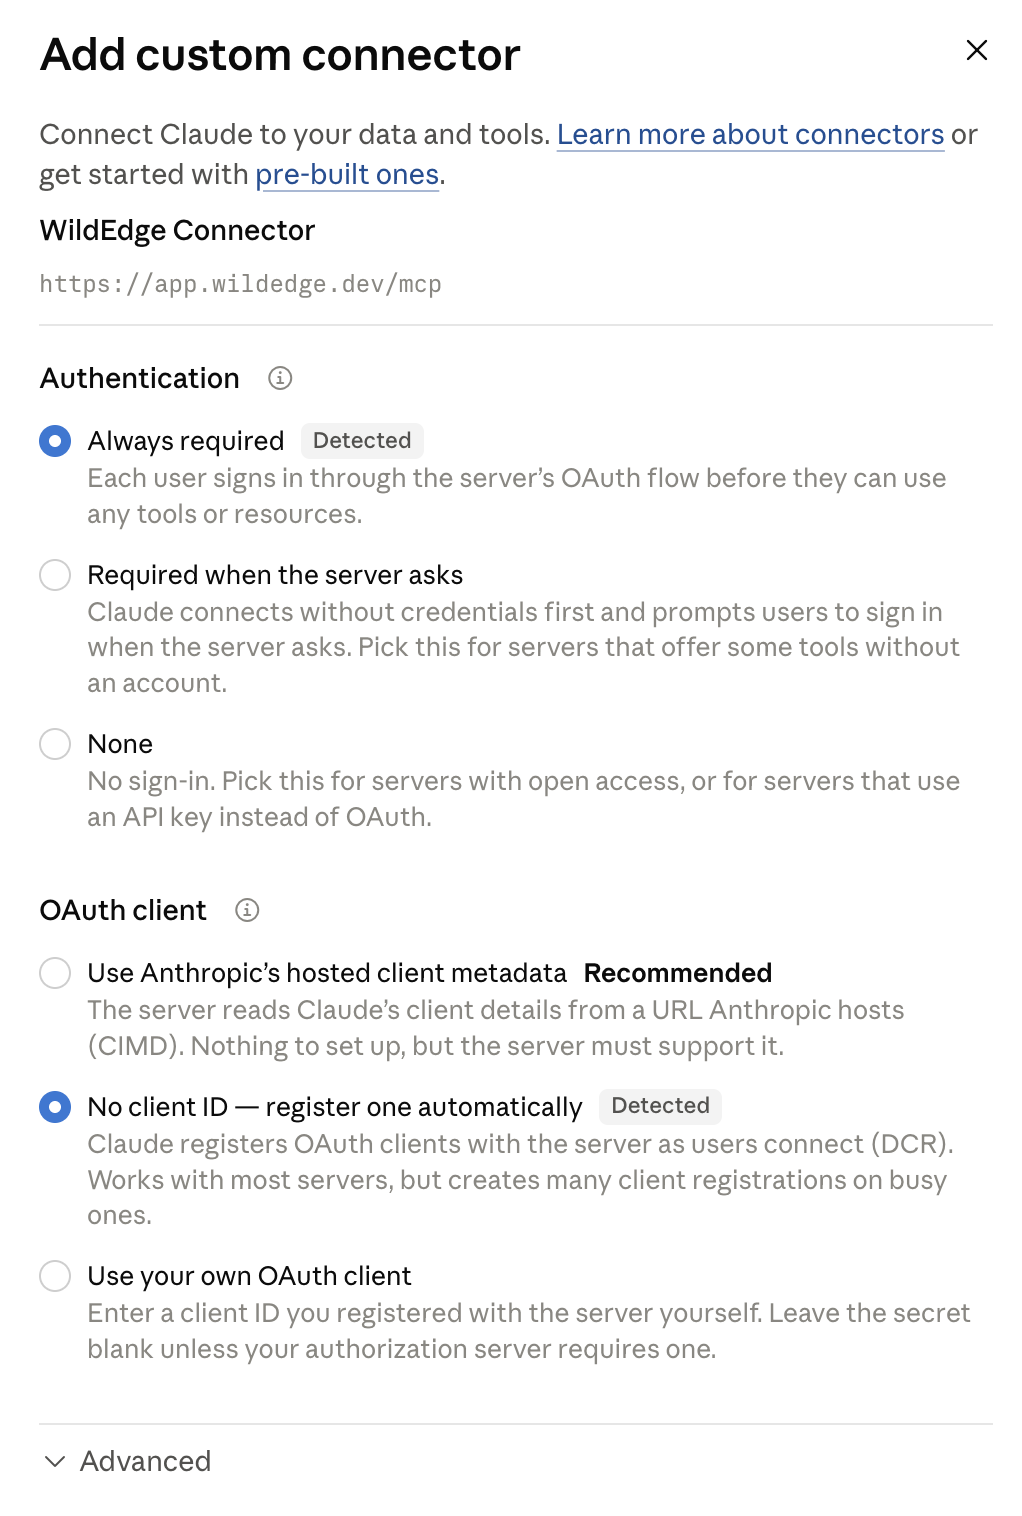
4. Confirm the detected authentication settings
Claude asks follow-up questions about authentication. WildEdge supports the settings Claude detects:
- Authentication: Always required
- OAuth client: No client ID — register one automatically
Keep these detected settings, leave Advanced unchanged, and finish adding the connector.
5. Connect Claude
On the new WildEdge connector, select Connect to start the OAuth flow.
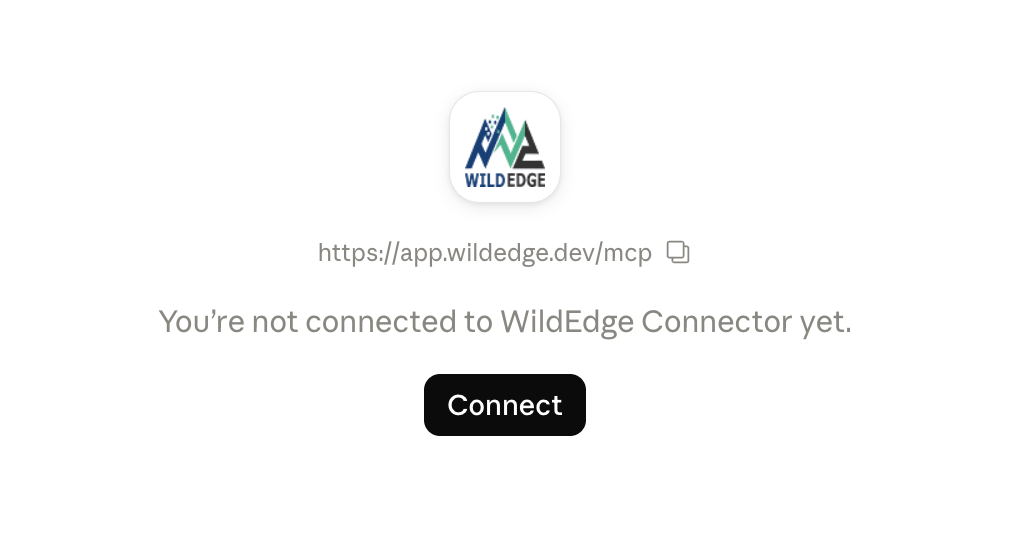
Then complete the shared WildEdge authorization flow.
For a Team or Enterprise organization, an owner may need to add WildEdge under Organization connectors before individual members can connect it. See Anthropic's custom connector guide for plan and organization details.
Authorize in WildEdge
The following steps are the same whether you connect ChatGPT, Claude, or another OAuth-capable web agent.
- If you are not already signed in to WildEdge, sign in when prompted.
- On the authorization screen, choose the least privilege the agent needs:
- Read lets the agent inspect the companies, projects, events, traces, dashboards, datasets, and integrations available to your WildEdge account.
- Read + Write also lets the agent create or update data through the write tools exposed by WildEdge MCP.
- Select Authorize. WildEdge returns you to the agent, which completes the connection.
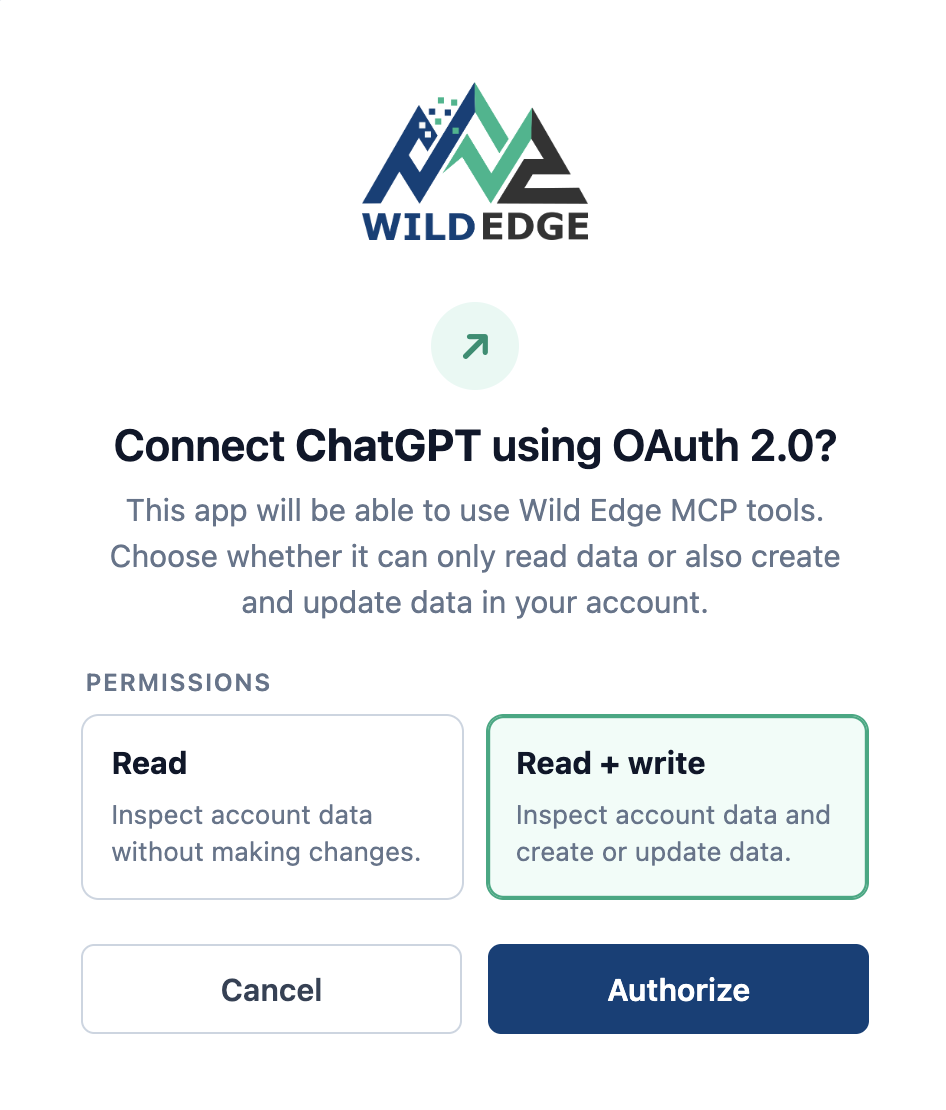
Your WildEdge password and session stay with WildEdge. The agent receives OAuth credentials only after you approve the connection.
Start with Read unless you intend to ask the agent to make changes. You can change the connection's permissions later in WildEdge.
Finish setup in your agent
Claude: set tool permissions
After authorizing the connection, open the WildEdge connector to control how Claude may use each MCP tool. Claude can allow a tool automatically, require your approval before using it, or disable it. You can set a default for a group and override individual tools.
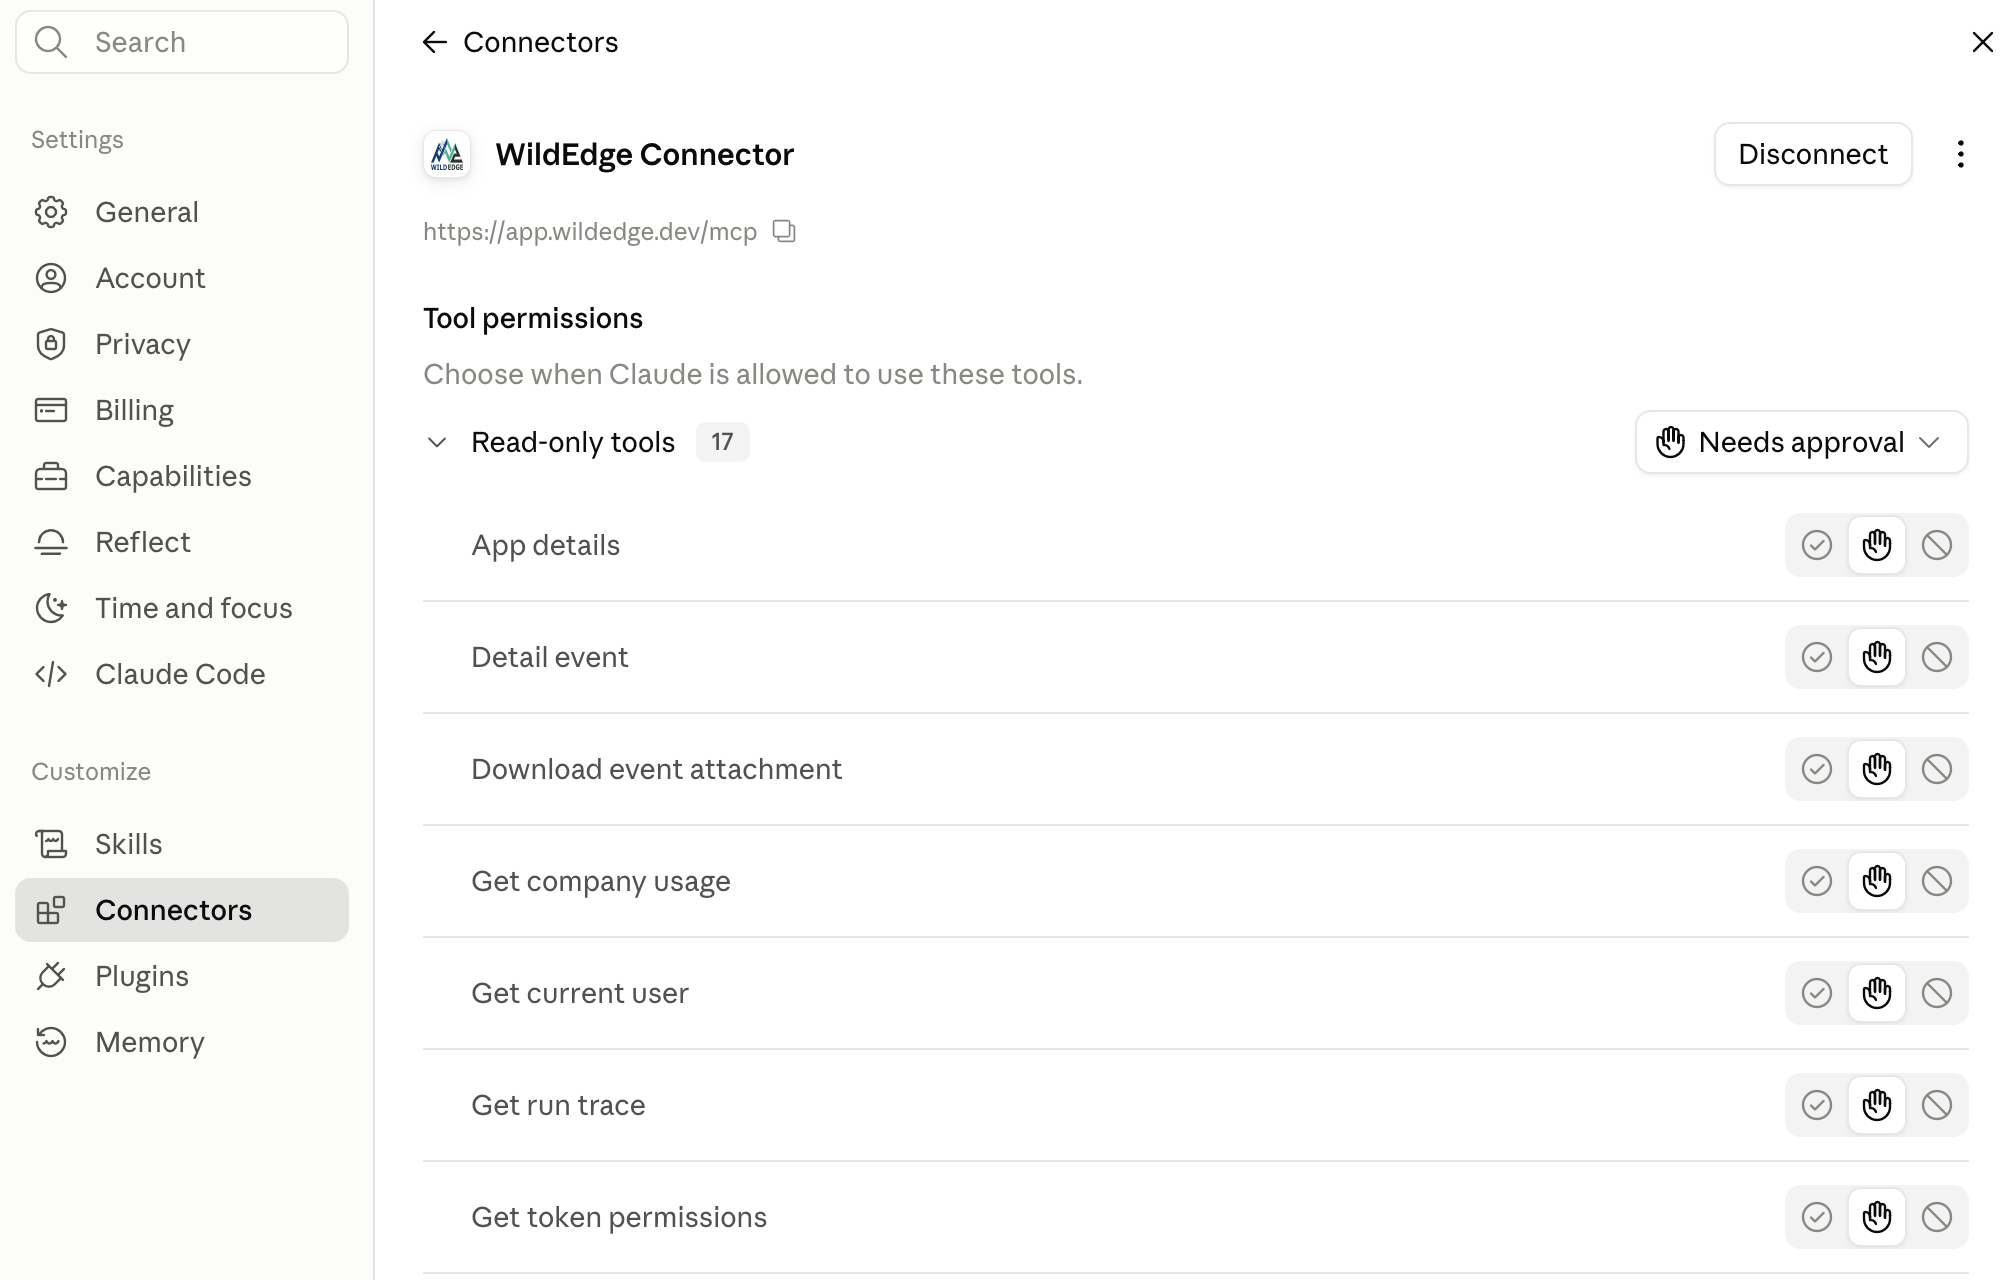
Claude's tool permissions are an independent, additional control layer. They do not expand the Read or Read + Write access granted in WildEdge. A tool works only when both WildEdge and Claude allow it.
Try the connection
Start a chat with the WildEdge plugin or connector available and ask a read-only question first:
List the WildEdge companies available to me, including my role in each company. Do not make any changes.
The agent discovers the tools exposed by WildEdge automatically. Its access remains limited by both your WildEdge account permissions and the permission level you approved for this OAuth connection.
Manage or revoke access
To review a connected web agent:
- Sign in to WildEdge.
- Open your profile and find MCP access.
- Select the OAuth connections tab.
- Select a connection to change it between Read and Read + Write, or choose Disconnect to revoke it.
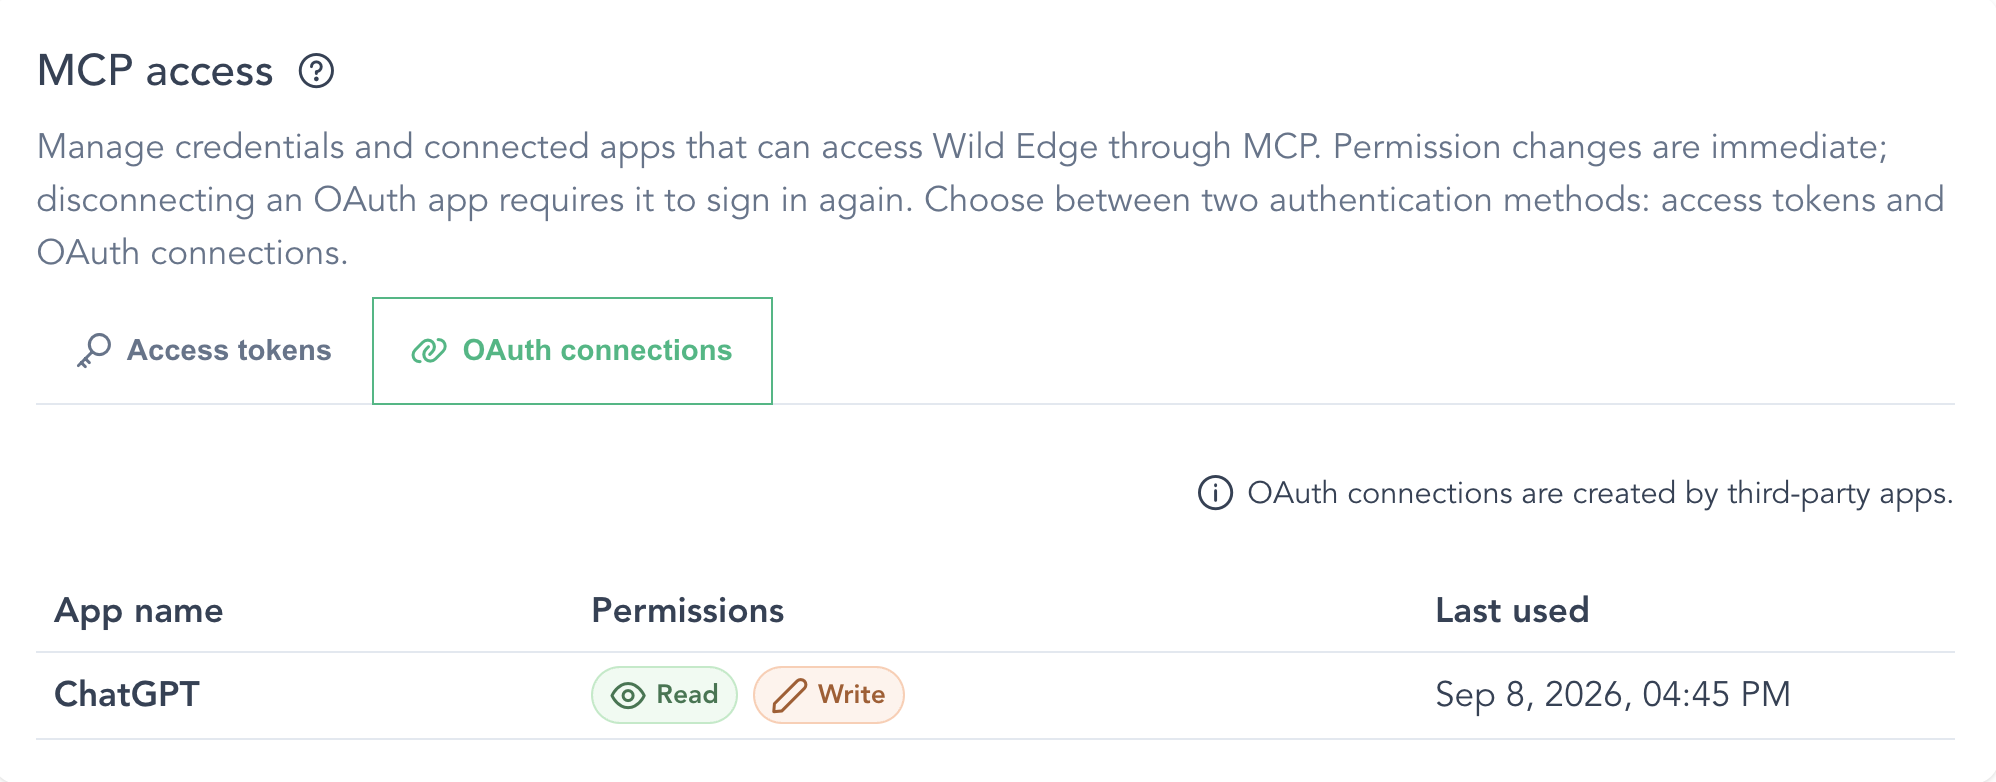
Permission changes take effect immediately. Disconnecting revokes the connection and requires that agent to complete the sign-in flow again before it can use WildEdge.
Troubleshooting
- The agent does not start the sign-in flow: confirm the server URL is exactly
https://app.wildedge.dev/mcpand authentication is set to OAuth. - The agent cannot see a company or project: MCP access follows the permissions of the WildEdge user who authorized the connection.
- A write action is unavailable: change the connection to Read + Write under MCP access → OAuth connections, then retry.
- A connection is unfamiliar or no longer needed: disconnect it immediately from the OAuth connections tab.